
Everything on this page happens in Edit Mode (Tab).
Select#
- Click a widget to select it.
- Shift click adds it to the selection. Shift click the active one to deselect it.
- Drag on empty space to box select. Click empty space to deselect all.
- A selects all, Alt+A deselects all (it also leaves the open group), Ctrl+I inverts the selection. These keys come from your Node Editor keymap (Select All), so your own bindings and Select All Toggles work.
Numpad .frames the selected widgets in the view (your Node Editor's Frame Selected key). Home frames them all. Both are in the View menu too.- The Selection menu has All, None and Invert, Duplicate and Delete.
Move, resize, rotate#
- Drag a widget to move it.
- G moves the selection, R rotates it, S scales it, Alt+R clears the rotation.
- The arrow keys nudge by 10 units, Shift + arrow by 1.
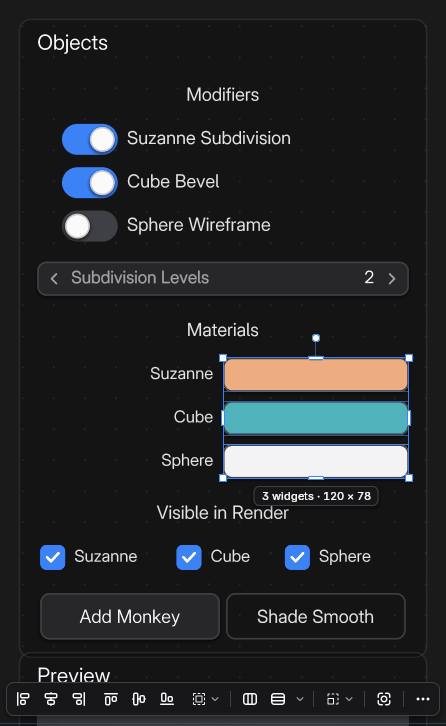
- The handles around the selection resize it (edges and corners) and rotate it (the round knob).
- Hold Alt to show the pivot and drag it.
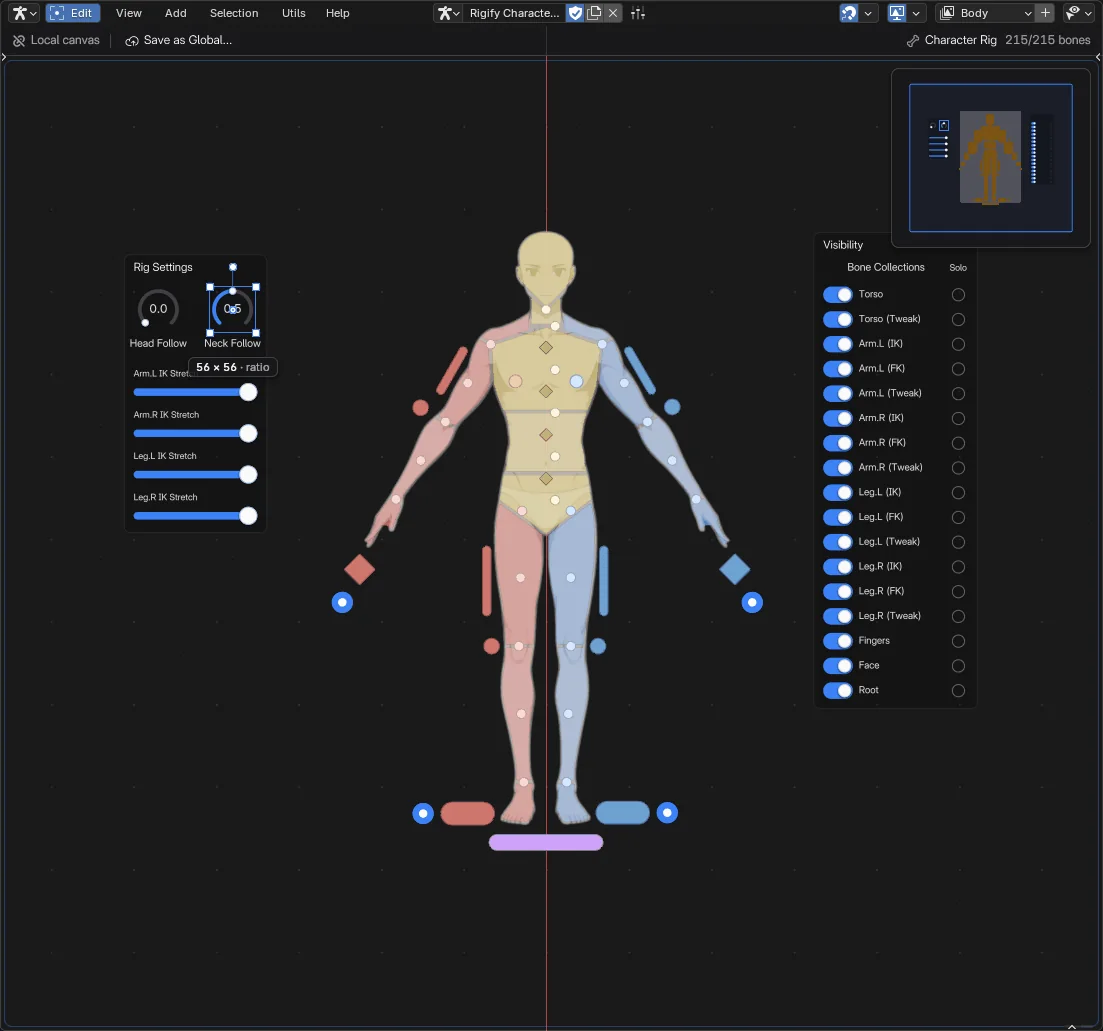 Screenshot
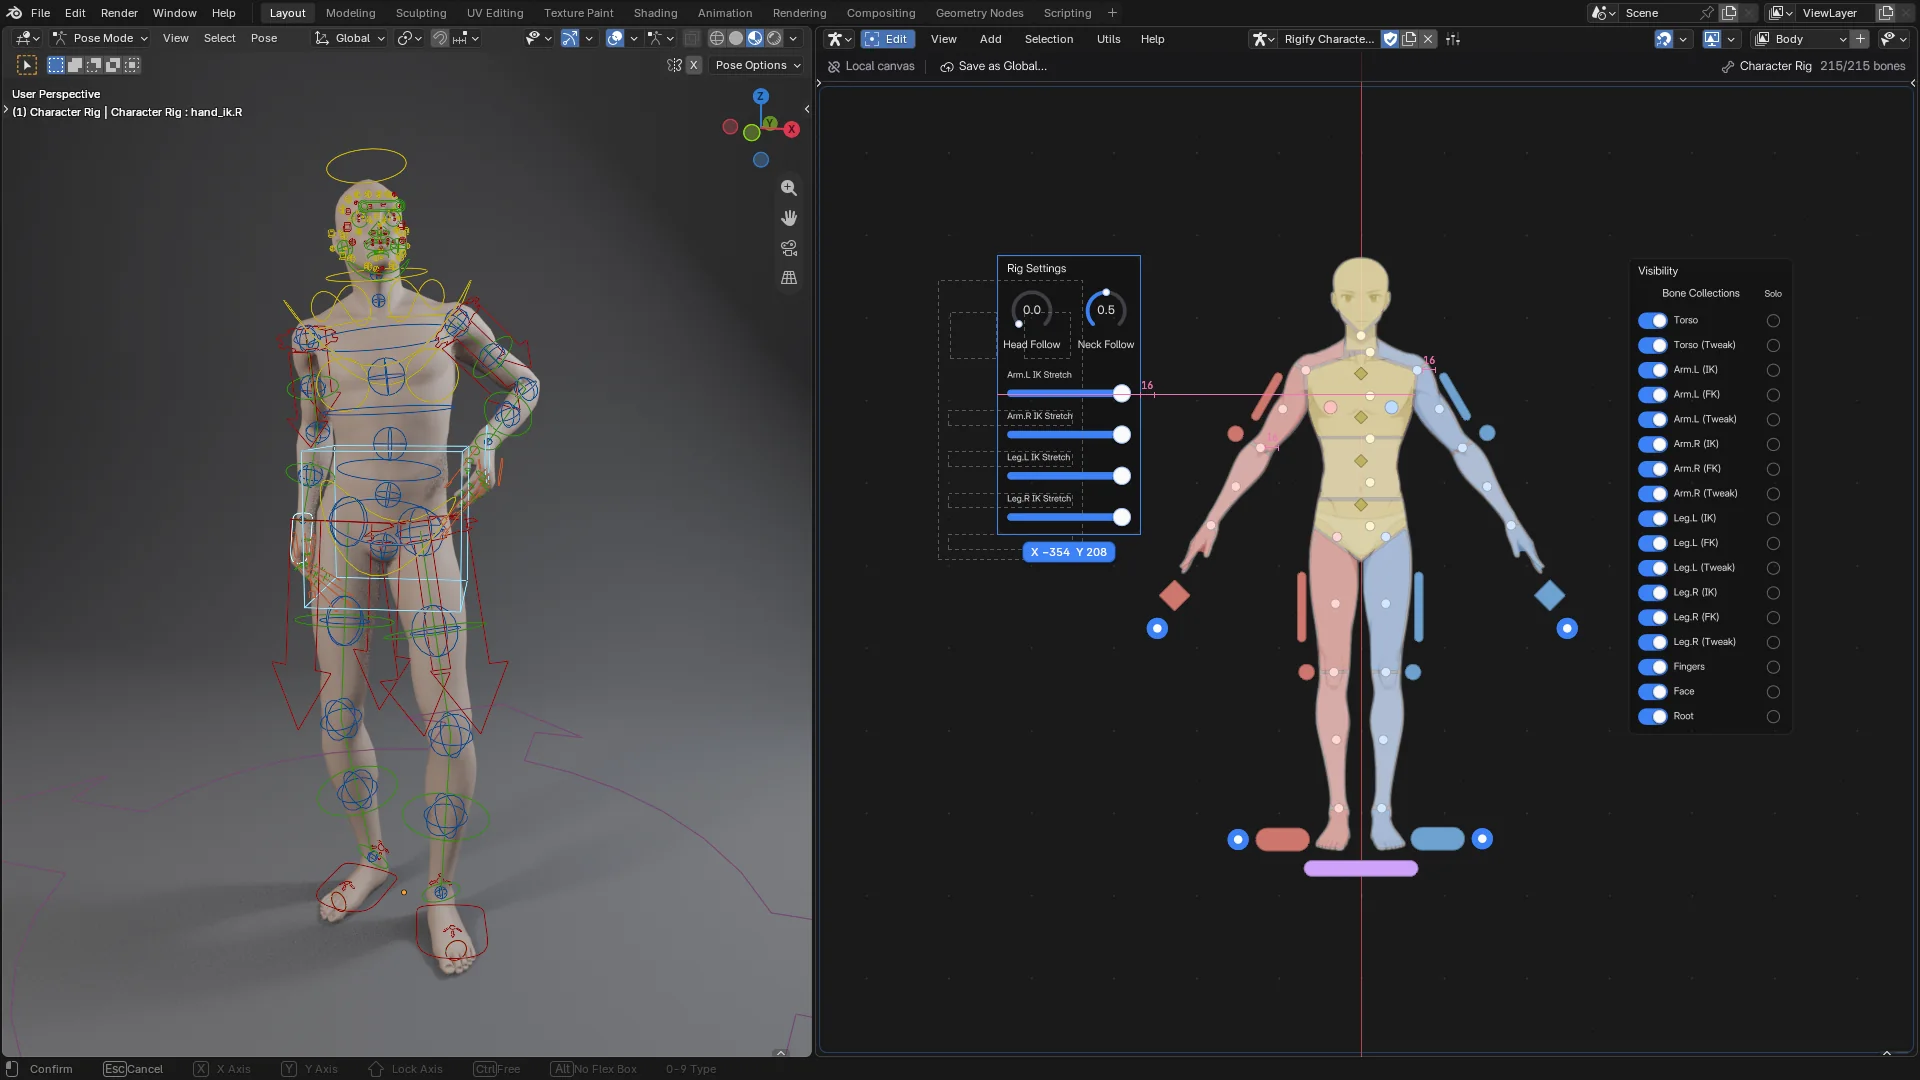
While you transform, the status bar lists the keys. The main ones:
- X / Y lock an axis.
- Shift keeps or frees the aspect ratio (resize), snaps to 15 degrees (rotate) or is finer (scale).
- Alt resizes from the centre.
- Ctrl snaps or, with smart snapping on, drags free.
- Type a number for an exact value.
- Enter confirms, Esc or right-click cancels.
 Screenshot
Smart snapping#
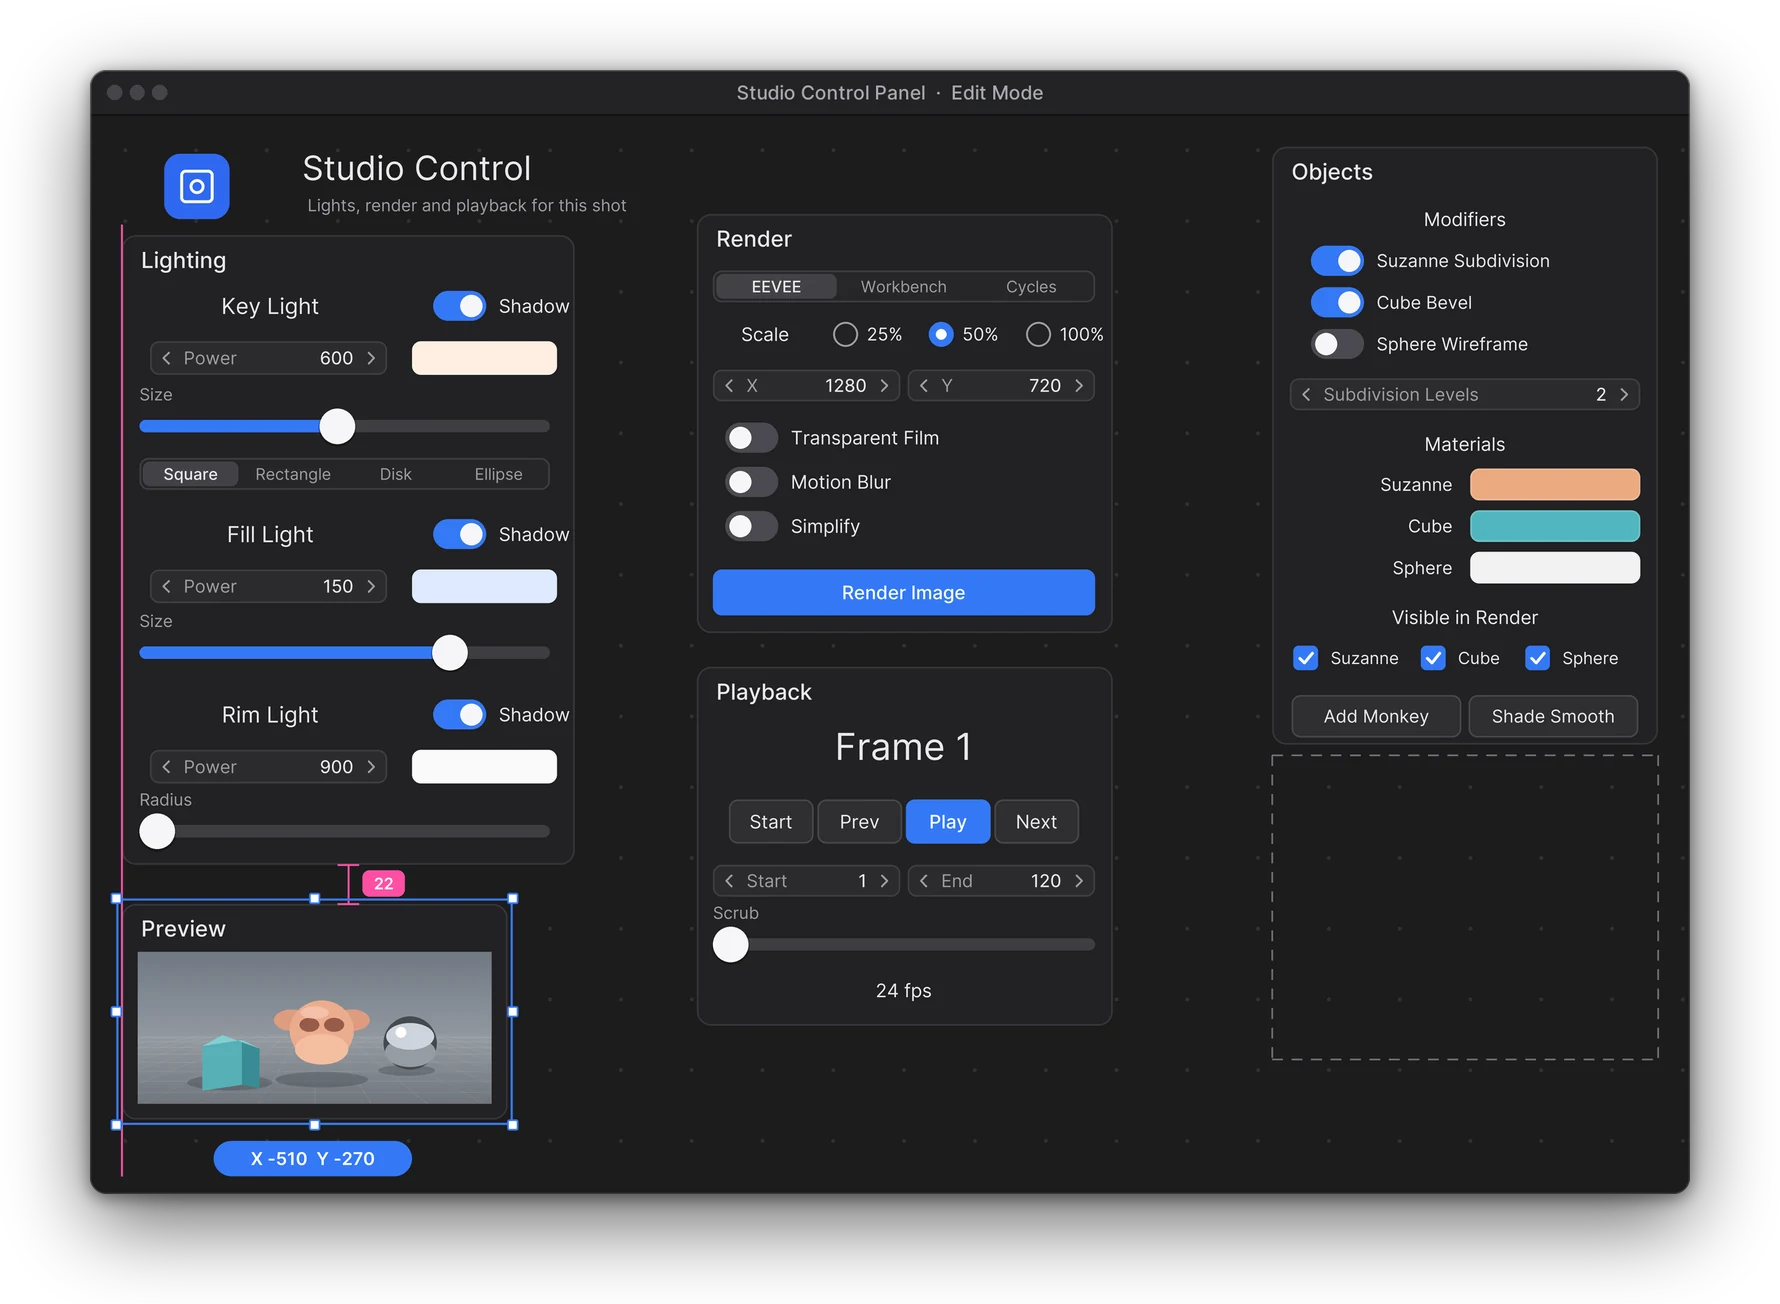
The magnet in the header turns snapping on or off for this canvas. Its arrow opens the settings:
- Snap To: edges, centres, spacing (equal gaps) and the grid (with its Grid Size).
- Snap Distance and Show Guides (the lines that show what you snapped to).
 Screenshot
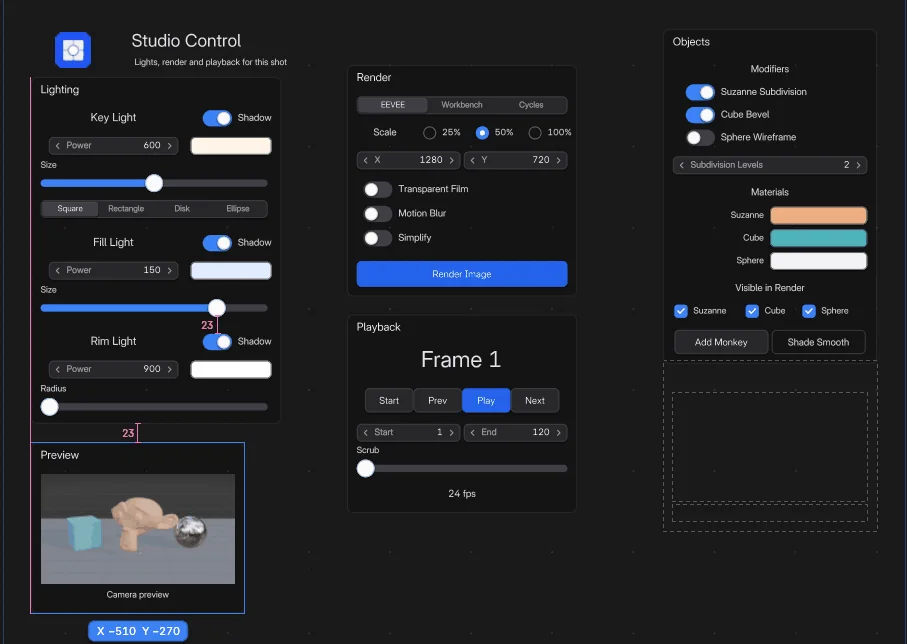 Screenshot
Duplicate, copy, delete#
- Shift+D duplicates and moves the copy. A group or Flex Box is duplicated with what is inside it, a frame with its widgets. Duplicate in the Selection menu puts the copy a little below right of the original instead.
- Ctrl+C copies the selected widgets, with the same rule.
- Ctrl+V pastes them under the mouse, on the active page, and you move them like after Shift+D. A click places them, Esc leaves them under the mouse.
- X or Delete deletes.
Copy and Paste are also in the Selection menu and the right-click menu. Paste from the right-click menu puts the widgets where you right-clicked; from the Selection menu, in the middle of the view. Once something is copied, a right-click with nothing selected opens a menu with just Paste. The status bar says how many widgets were copied or pasted, or why nothing was copied.
What you copy stays copied until you copy again:
- Paste as many times as you like. Each paste is a new copy with its own settings, operator arguments included.
- A Script button is pasted with its script as it was when you copied it, in a new text of its own.
- Paste into another canvas of the same kind: Flex Space widgets go into Flex Space canvases, picker widgets into picker canvases. The status bar says when the kinds don't match.
- The copy is kept even if you delete the original widgets or open another file.
- A widget copied without its group, Flex Box or frame is pasted on its own.
Ctrl+Z undoes a paste in one step.
Groups#
A group moves, rotates and resizes several widgets as one. It has no graphic of its own.
- Ctrl+G groups the selection, Alt+G ungroups it.
- Double-click a group to enter it and select one of its widgets. Double-click again to go into a group inside it.
- Esc or a click outside leaves the group.
- Ctrl click picks one widget inside a group without entering it first.
- Shift+A, Shift+D and Ctrl+V inside an open group add the new widgets to that group. A pasted frame stays out of it, with its widgets.
- Grouping widgets from different frames puts the group in the frame under its centre, or in none. The other frames let go of them.
Frames#
A frame is a titled area that owns the widgets in it: moving it moves them.
- Ctrl+J frames the selection. A widget inside a group or Flex Box is framed with its outermost group or Flex Box, which carries the rest.
- Alt+P removes widgets from their frame (a widget inside a group or Flex Box: its outermost group or Flex Box).
- Drop a widget inside a frame to add it.
- With Shrink on, the frame fits its contents.
- Make a frame smaller and the widgets left outside it (their centre outside the frame) leave it, as when you drag them out. One Ctrl+Z gives back both the size and the widgets.
Selection Bar#
With two or more widgets (or a group) selected, a bar appears at the bottom of the canvas:
- Align left, centre, right, top, middle, bottom, and Align To (the selection bounds, the active widget or the canvas origin).
- Distribute horizontally or vertically.
- Size: match or normalize sizes.
- Group and Ungroup, and More for the rest of the Selection menu.
Good to know:
- Hover a button to see what it does, and why a greyed one can't.
- The bar moves to the top when the selection is under it.
- Choose where it shows, or turn it off, in View > Selection Bar (also in the add-on preferences).
- The same tools are in the header Selection menu and the right-click menu, with Order (bring forward, send back) and Match Rotation.
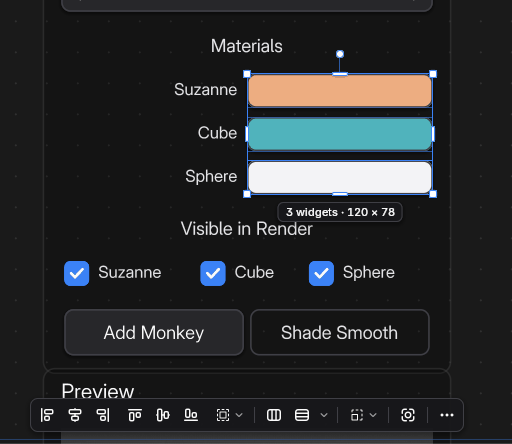 Screenshot
Right-click menu#
Right-click a selection for the context menu: frames, Flex Box, groups, order and Delete.
Minimap#
The picture button in the header shows the minimap, a small map of the whole canvas. Its arrow sets when it shows (Edit Mode, Live Mode), its Corner, its Size and whether it draws the widgets.
- Click the map to centre the view there, drag to pan.
- Double-click frames every widget, the wheel zooms.
- Drag its corner grips to move it to another corner or resize it.
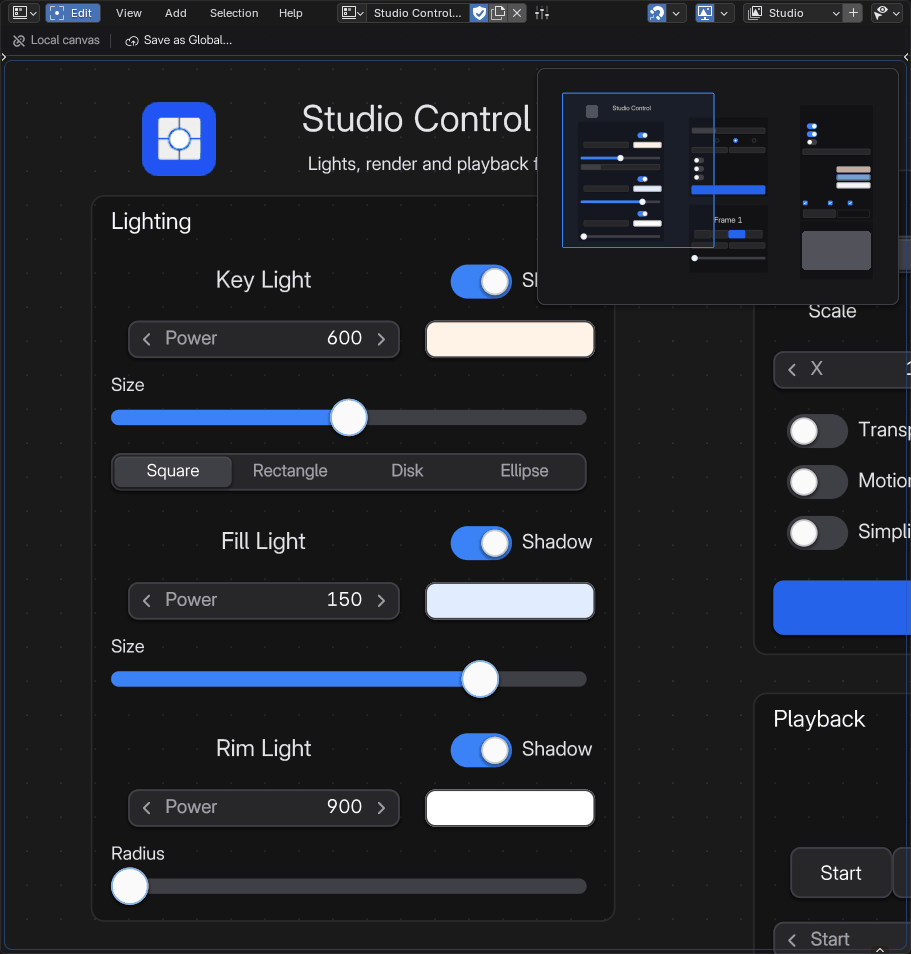 Screenshot
Themes#
The theme sets the colours, shapes and type of every widget, on every canvas.
- Pick a theme from View > Theme in the header.
- The same menu has Appearance (Auto follows Blender's theme, Dark, Light), Edit Themes... and Reload Library.
- Text drawn straight on the canvas (labels, frame titles) always follows the editor's background, so it stays readable when you force Dark or Light against it. A page tab that doesn't fit the current mode is dimmed, but never so much that you can't read it.
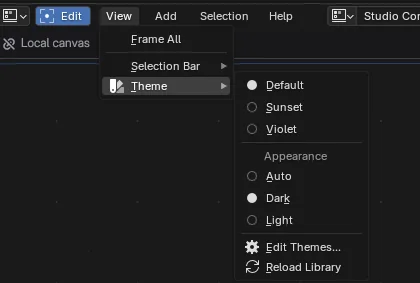 Screenshot
To make your own theme:
- Open Edit Themes... (the Themes section of the add-on preferences).
- Make a New Theme (a copy of Default) or Duplicate the active one.
- Change it.